Jetson Nano 를 이용한 Object Detection으로 당연히 YOLO를 떠올렸으며 구글링을 통해서 먼저 이길을 가시면서 친절하게 방법과 입력코드를 남겨주신대로 진행을 해봤으나 YOLO신의 버림을 받아서인지... 샘플 이미지를 통한 결과는 정상적으로 출력이 되지만 pi camera를 이용한 실시간 Detection 은 실패를 하였다. (이상하게 카메라 영상을 보여주는 창이 온통 초록색으로 꽉찬 상황 ㅠ.ㅠ)
그래서 다른 방법이 없는지 찾게 되었고 YOLO v5 를 시도했던 시간의 거의 1/3 정도만으로 생각보다 훌륭한 결과를 얻을수 있었던 내용을 공유해본다.
해당내용의 출처는 NVIDIA Developer 채널에서 아래 주소의 Youtube 영상을 시작으로 얻을수 있었으며
소개 페이지는
https://developer.nvidia.com/blog/realtime-object-detection-in-10-lines-of-python-on-jetson-nano/
Real-Time Object Detection in 10 Lines of Python on Jetson Nano | NVIDIA Developer Blog
To help you get up-and-running with deep learning and inference on NVIDIA’s Jetson platform, today we are releasing a new video series named Hello AI World to help you get started.
developer.nvidia.com
github 자료는 아래와 같다.
https://github.com/dusty-nv/jetson-inference
GitHub - dusty-nv/jetson-inference: Hello AI World guide to deploying deep-learning inference networks and deep vision primitive
Hello AI World guide to deploying deep-learning inference networks and deep vision primitives with TensorRT and NVIDIA Jetson. - GitHub - dusty-nv/jetson-inference: Hello AI World guide to deployin...
github.com
Dustin Franklin 님(?)의 소개대로 진행을 한단계씩 밟아 나가다 보니.. 어느새 카메라를 통해서 실시간 Detection 되는 결과를 볼수 있었으며... jetson nano를 이용한 뭔가 첫 결과물(?)을 확인할수 있었던 내용이었다.
시작은 설치되어 있는 패키지들의 새로운 버전이 있는지 확인 부터...
$ sudo apt-get update -y설치된 패키지들의 최신버전에 따라 업그레이드두 GoGo...
$ sudo apt-get upgrade -y다음단계는 필요한 패키지 설치~
$ sudo apt-get install git make libpython3-dev python3-numpy -ygit clone 으로 간단히 가져오기~~
$ git clone --recursive https://github.com/dusty-nv/jetson-inference
$ cd jetson-inference/

$ mkdir build

$ cd build

$ cmake ../
까지 진행하면 모델을 다운로드 받을수 있는 창이 뜬다...

짜란~~~ Hello AI World - Model Downloader
여기서 다운로드 받을수 있는 모델은 아래와 같다. (2021년 11월 19일 기준)
- Image Recognition - all models
- AlexNet
- GoogleNet
- GoogleNet -12
- ResNet-18
- ResNet-50
- ResNet-101
- ResNet-152
- VGG-16
- VGG-19
- Inception-v4
- Object Detection - all models
- SDD-Mobilenet-v1
- SDD-Mobilenet-v2
- SDD-Mobilenet-v3
- PedNet
- Multipad
- FaceNet
- DetectNet-COCO-DOG
- DetectNet-COCO-Bottle
- DetectNet-COCO-chair
- DetectNet-COCO-airPlane
- Mono Depth - all models
- ModoDepth-FCN-Mobilenet
- ModoDepth-FCN-ResNet18
- ModoDepth-FCN-ResNet50
- Pose Estimation - all models
- Pose-ResNet18-Body
- Pose-ResNet18-Hand
- Pose-DenseNet121-Body
- Semantic Segmentation - all
- FCN-ResNet18-Cityscapes-512x256
- FCN-ResNet18-Cityscapes-1024x512
- FCN-ResNet18-Cityscapes-2048x1024
- FCN-ResNet18-DeepScence-576x320
- FCN-ResNet18-DeepScence-864x480
- FCN-ResNet18-MHP- 512x320
- FCN-ResNet18-MHP-640x360
- FCN-ResNet18-Pascal-VOC-320x320
- FCN-ResNet18-Pascal-VOC-512x320
- FCN-ResNet18-SUN-RGBD-512x480
- ResNet18-SUN-RGBD-640x512
- Semantic Segmentation - legacy
- FCN-Alexnet-Cityscapes-SD
- FCN-Alexnet-Cityscapes-HD
- FCN-Alexnet-Aerial-FPV
- FCN-Alexnet-Pascal-VOC
- FCN-Alexnet-Synthia-CVPR
- FCN-Alexnet-Synthia-Summer-SD
- FCN-Alexnet-Synthia-Summer-HD
- Image Processing - all models
- Deep-Homography-COCO
- SUper-Resolution-BSD500
이중에서 필요한 모델을 선택해서 <OK> 또는 Enter 키를 눌러주면... 막 신나게.. 설치해준다..
설치가 끝나면 바로 PyTorch Installer 화면이 뜨는데... 영상에서는 이부분은 Skip 처리 해줬다.. PyTorch 설치가 필요하신분은 이곳에서 설치도 선택하면 설치해준다...

저의 경우는 어차피 처음 테스트 시도 였으며 언젠가 쓰지 않겠어? 안쓰면 말구... jetson nano 에서는 PyTorch를 마니마니 쓴데... 를 들어와서... 그냥 설치했다...
그 다음단계는 make 설치...
make 에 대해서 찾아보니 프로그램 그룹을 유지하는데 필요한 유틸리티로 make유틸리티의 목적은 프로그램 그룹 중에서 어느 부분이 새롭게 컴파일되어야 하는지를 자동적으로 판단해서 필요한 커맨드(gcc따위)를 이용해서 그들을 재컴파일 시킨다고 한다..
여튼 필요한가보다.. 설치 GoGo
$ make시간이 좀 걸린다... 설치 걸어놓구 다른 업무 보기 딱 좋다...
$ sudo make install하면 이제 거의 끝이 보이는....
공유 라이브러리 캐시를 다시 설정하고..
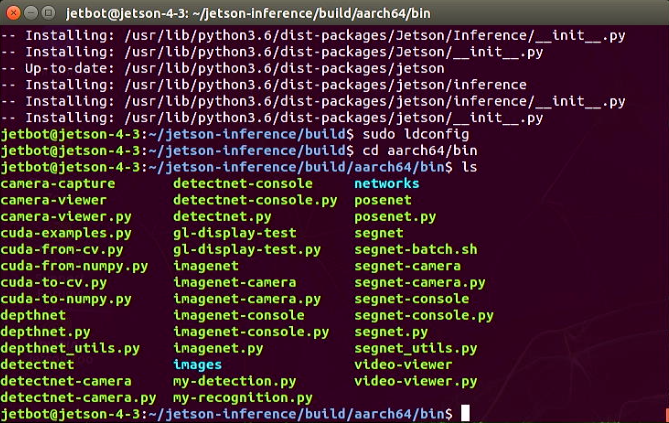
$ sudo ldconfigaarch64/bin 으로 이동해서 확인해보면...
$ cd aarch64/bin
$ ls
설치가 되어있는 내용을 확인할 수 있다.
이제 테스트 이미지를 이용해서 테스트 해보자..
$ ./detectnet-console.py images/peds_0.jpg output_0.jpg

결과값을 확인할수 있었다..
pi-camera를 이용해서 실시간 디텍션이 가능하다.
연결한 카메라가 잘 작동하는지 먼제 체크해보자..
$ gst-launch-1.0 nvarguscamerasrc ! nvoverlaysink
마지막으로.. text editer 를 열어서 my-detection.py 파일명을 home 에 save as 한뒤.... 다음 코드를 입력 저장한다..
import jetson.inference
import jetson.utils

net = jetson.inference.detectNet("ssd-mobilenet-v2", threshold=0.5)
camera = jetson.utils.videoSource("csi://0")      # '/dev/video0' for V4L2
display = jetson.utils.videoOutput("display://0") # 'my_video.mp4' for file

while display.IsStreaming():
	img = camera.Capture()
	detections = net.Detect(img)
	display.Render(img)
	display.SetStatus("Object Detection | Network {:.0f} FPS".format(net.GetNetworkFPS()))
저장했으면... 마지막 리얼타임 디텍팅이 되는지 테스트 해보자...
만약을 위해.. 파일도 공유 해본다..
위 코드의 경우... CSI 카메라를 이용할때적용되는 코드이다.. USB카메라의 경우(V4L2) 코드를 수정해주자...
우선 V4L2 드라이버를 설치해주고....
$ sudo apt-get install v4l-utils연결된 USB 카메라의 디바이스 번호를 확인하는 방법은....
$ v4l2-ctl --list-devices하여 디바이스 번호를 확인하자...
아래 코드는 같이 스터디를 진행한 오휴민님 께서 수정 정리해주신 코드다.. 깔끔하다...
import jetson.inference
import jetson.utils

net = jetson.inference.detectNet("ssd-mobilenet-v2", threshold=0.5)

camera = jetson.utils.gstCamera(1280, 720, "/dev/video0")	# USB camera ONLY
# camera = jetson.utils.gstCamera(1280, 720, "/dev/video1")	# CSI camera + USB camera
#camera = jetson.utils.videoSource("csi://0")			# CSI camera ONLY
display = jetson.utils.glDisplay()				# USB camera ONLY
#display = jetson.utils.videoOutput("display://0")		# CSI camera ONLY

### USB camera ###
while display.IsOpen():
	img, width, height = camera.CaptureRGBA()
	detections = net.Detect(img, width, height)
	display.RenderOnce(img, width, height)
	display.SetTitle("Object Detection | Network {:.0f} FPS".format(net.GetNetworkFPS()))

### CSI camera ###
#while display.IsStreaming():
#	img = camera.Capture()
#	detections = net.Detect(img)
#	display.Render(img)
# display.SetStatus("Object Detection | Network {:.0f} FPS".format(net.GetNetworkFPS()))마지막으로....
$ cd ~로 이동한뒤...
$ python3 my-detection.py하면 실시간 디텍딩 퇴는것을 확인할 수 있다.
'AIFFEL > Jetson Nano' 카테고리의 다른 글
| Jetson Nano 초기 셋팅 - Ubuntu 18.04 초기설정!! 2/2 (0) | 2022.03.27 |
|---|---|
| Jetson Nano 초기 셋팅 - JetPack 설치해보자...!! 1/2 (0) | 2022.03.26 |
| 메모리 선택시 주의 사항 (0) | 2022.03.22 |
| Jetson Nano 시작하기 (0) | 2021.11.18 |